• Published on

    Free Printable Bookmarks for Quilters

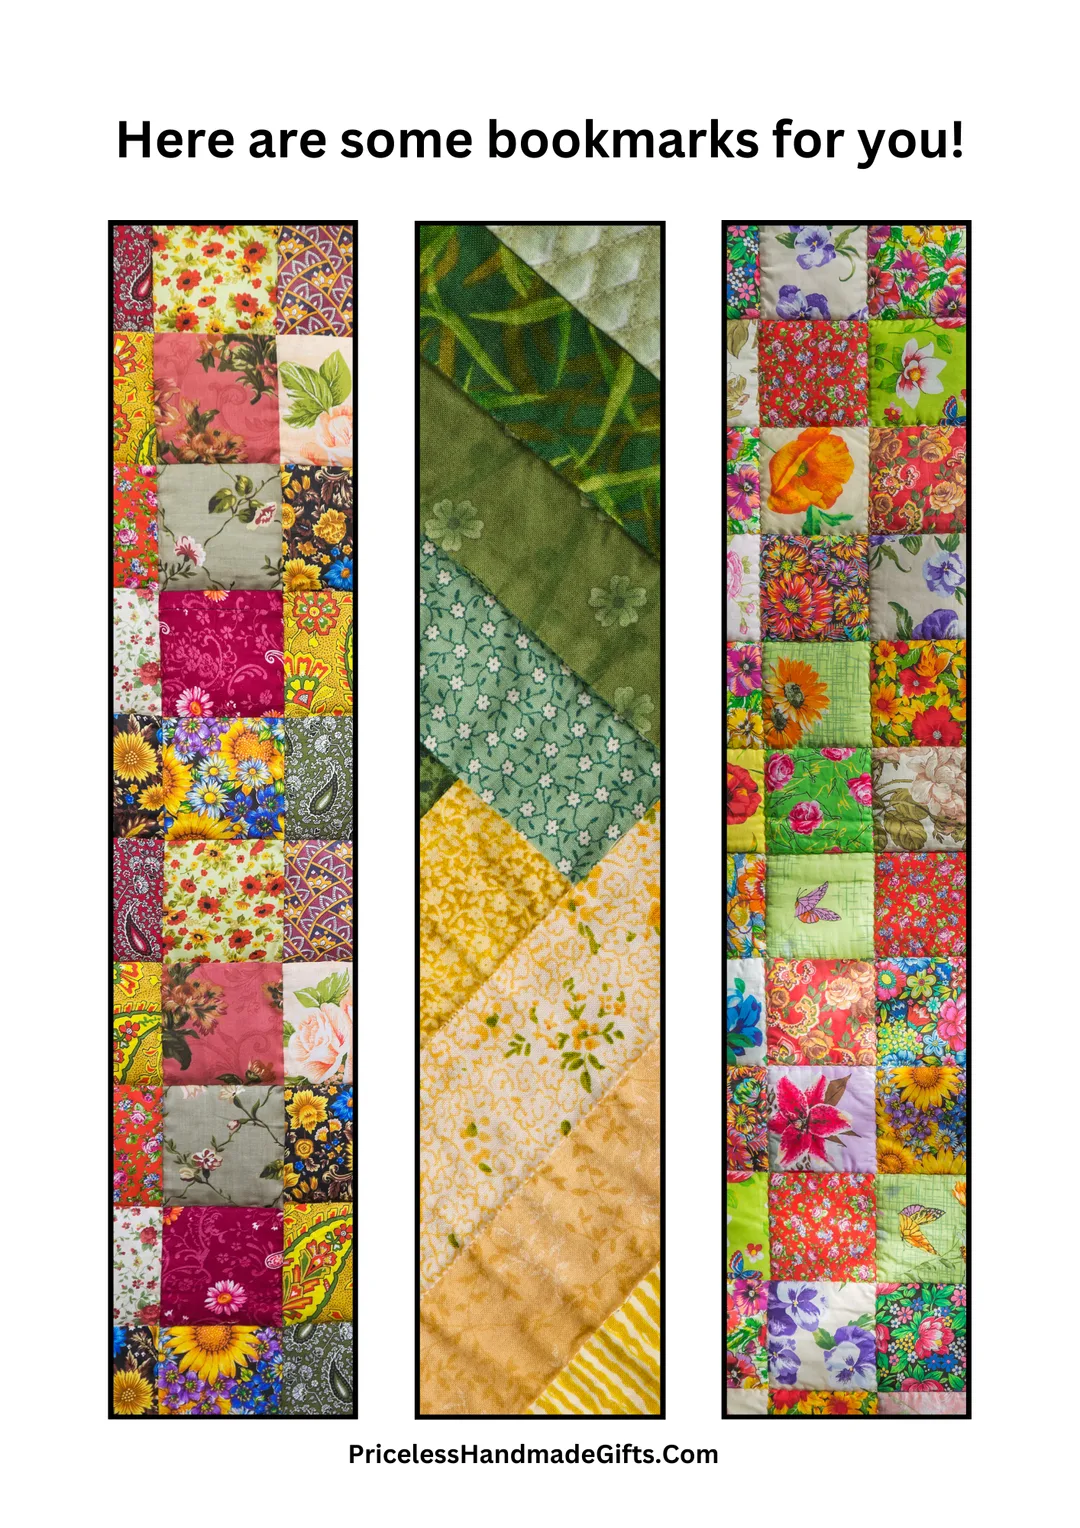
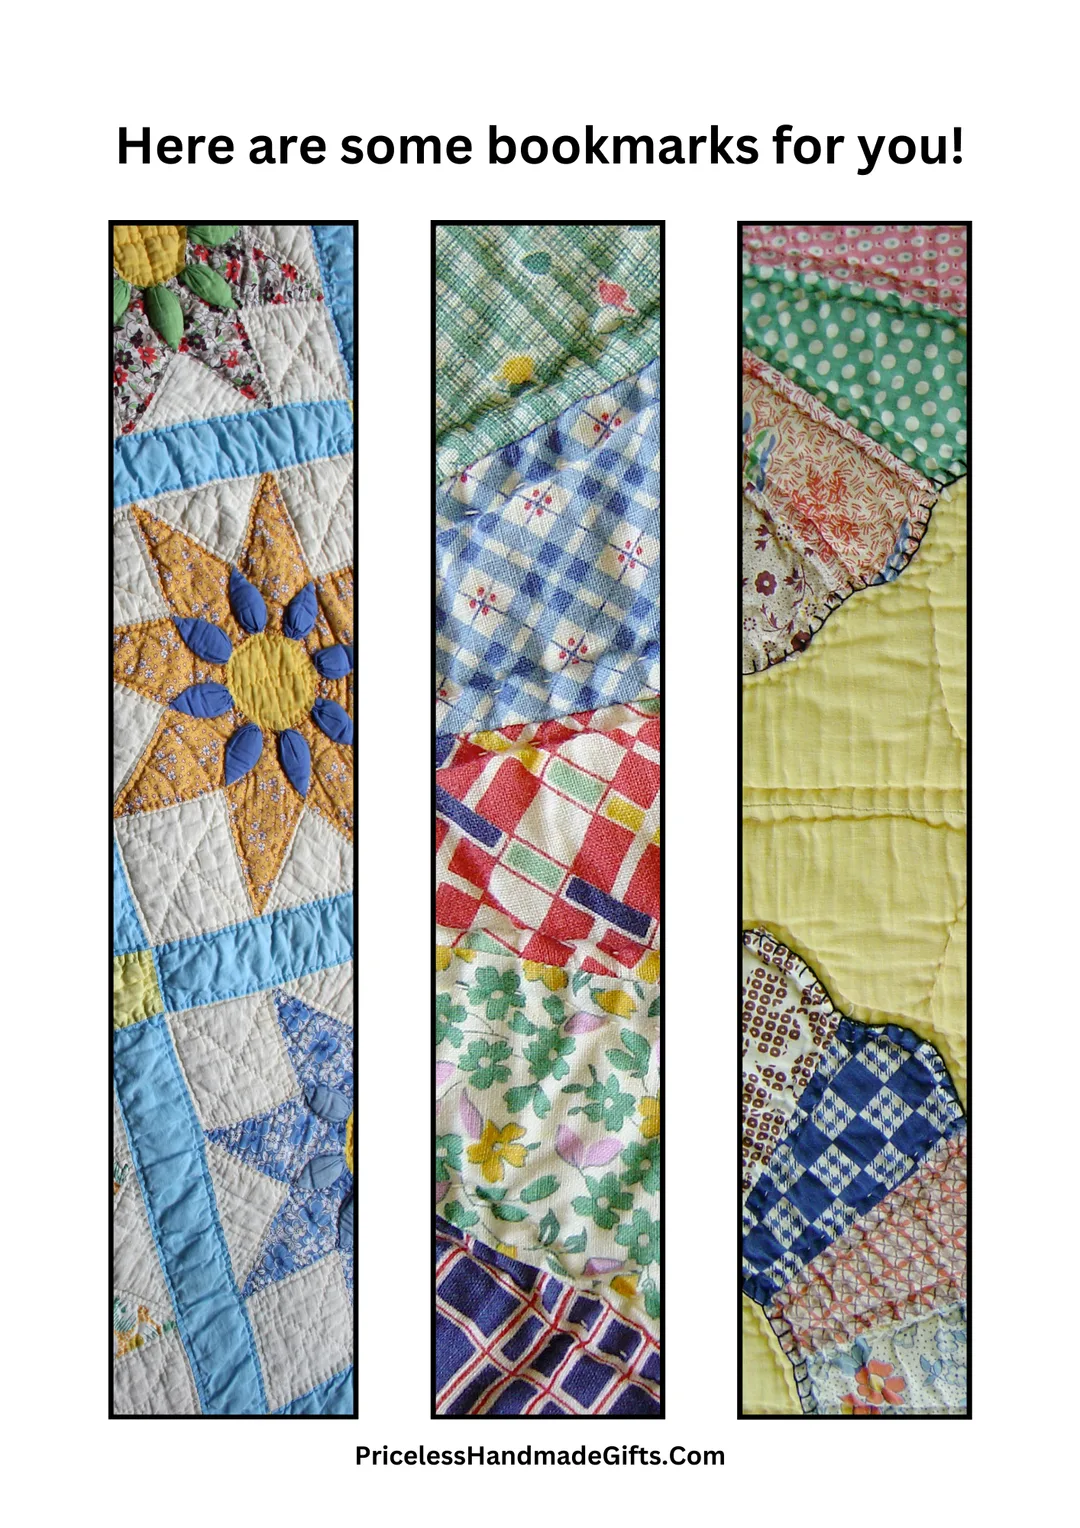
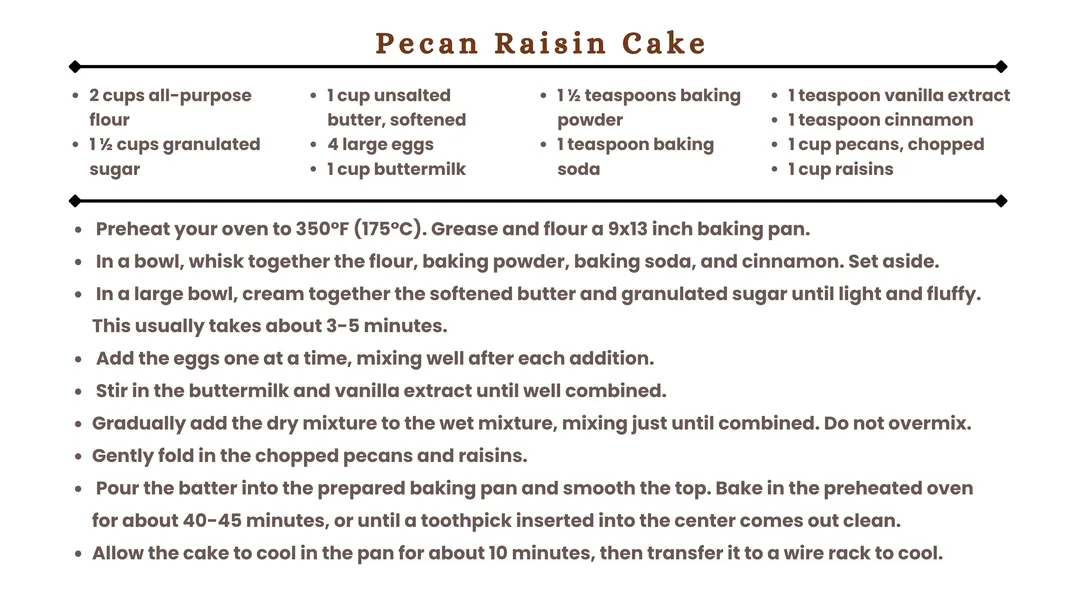
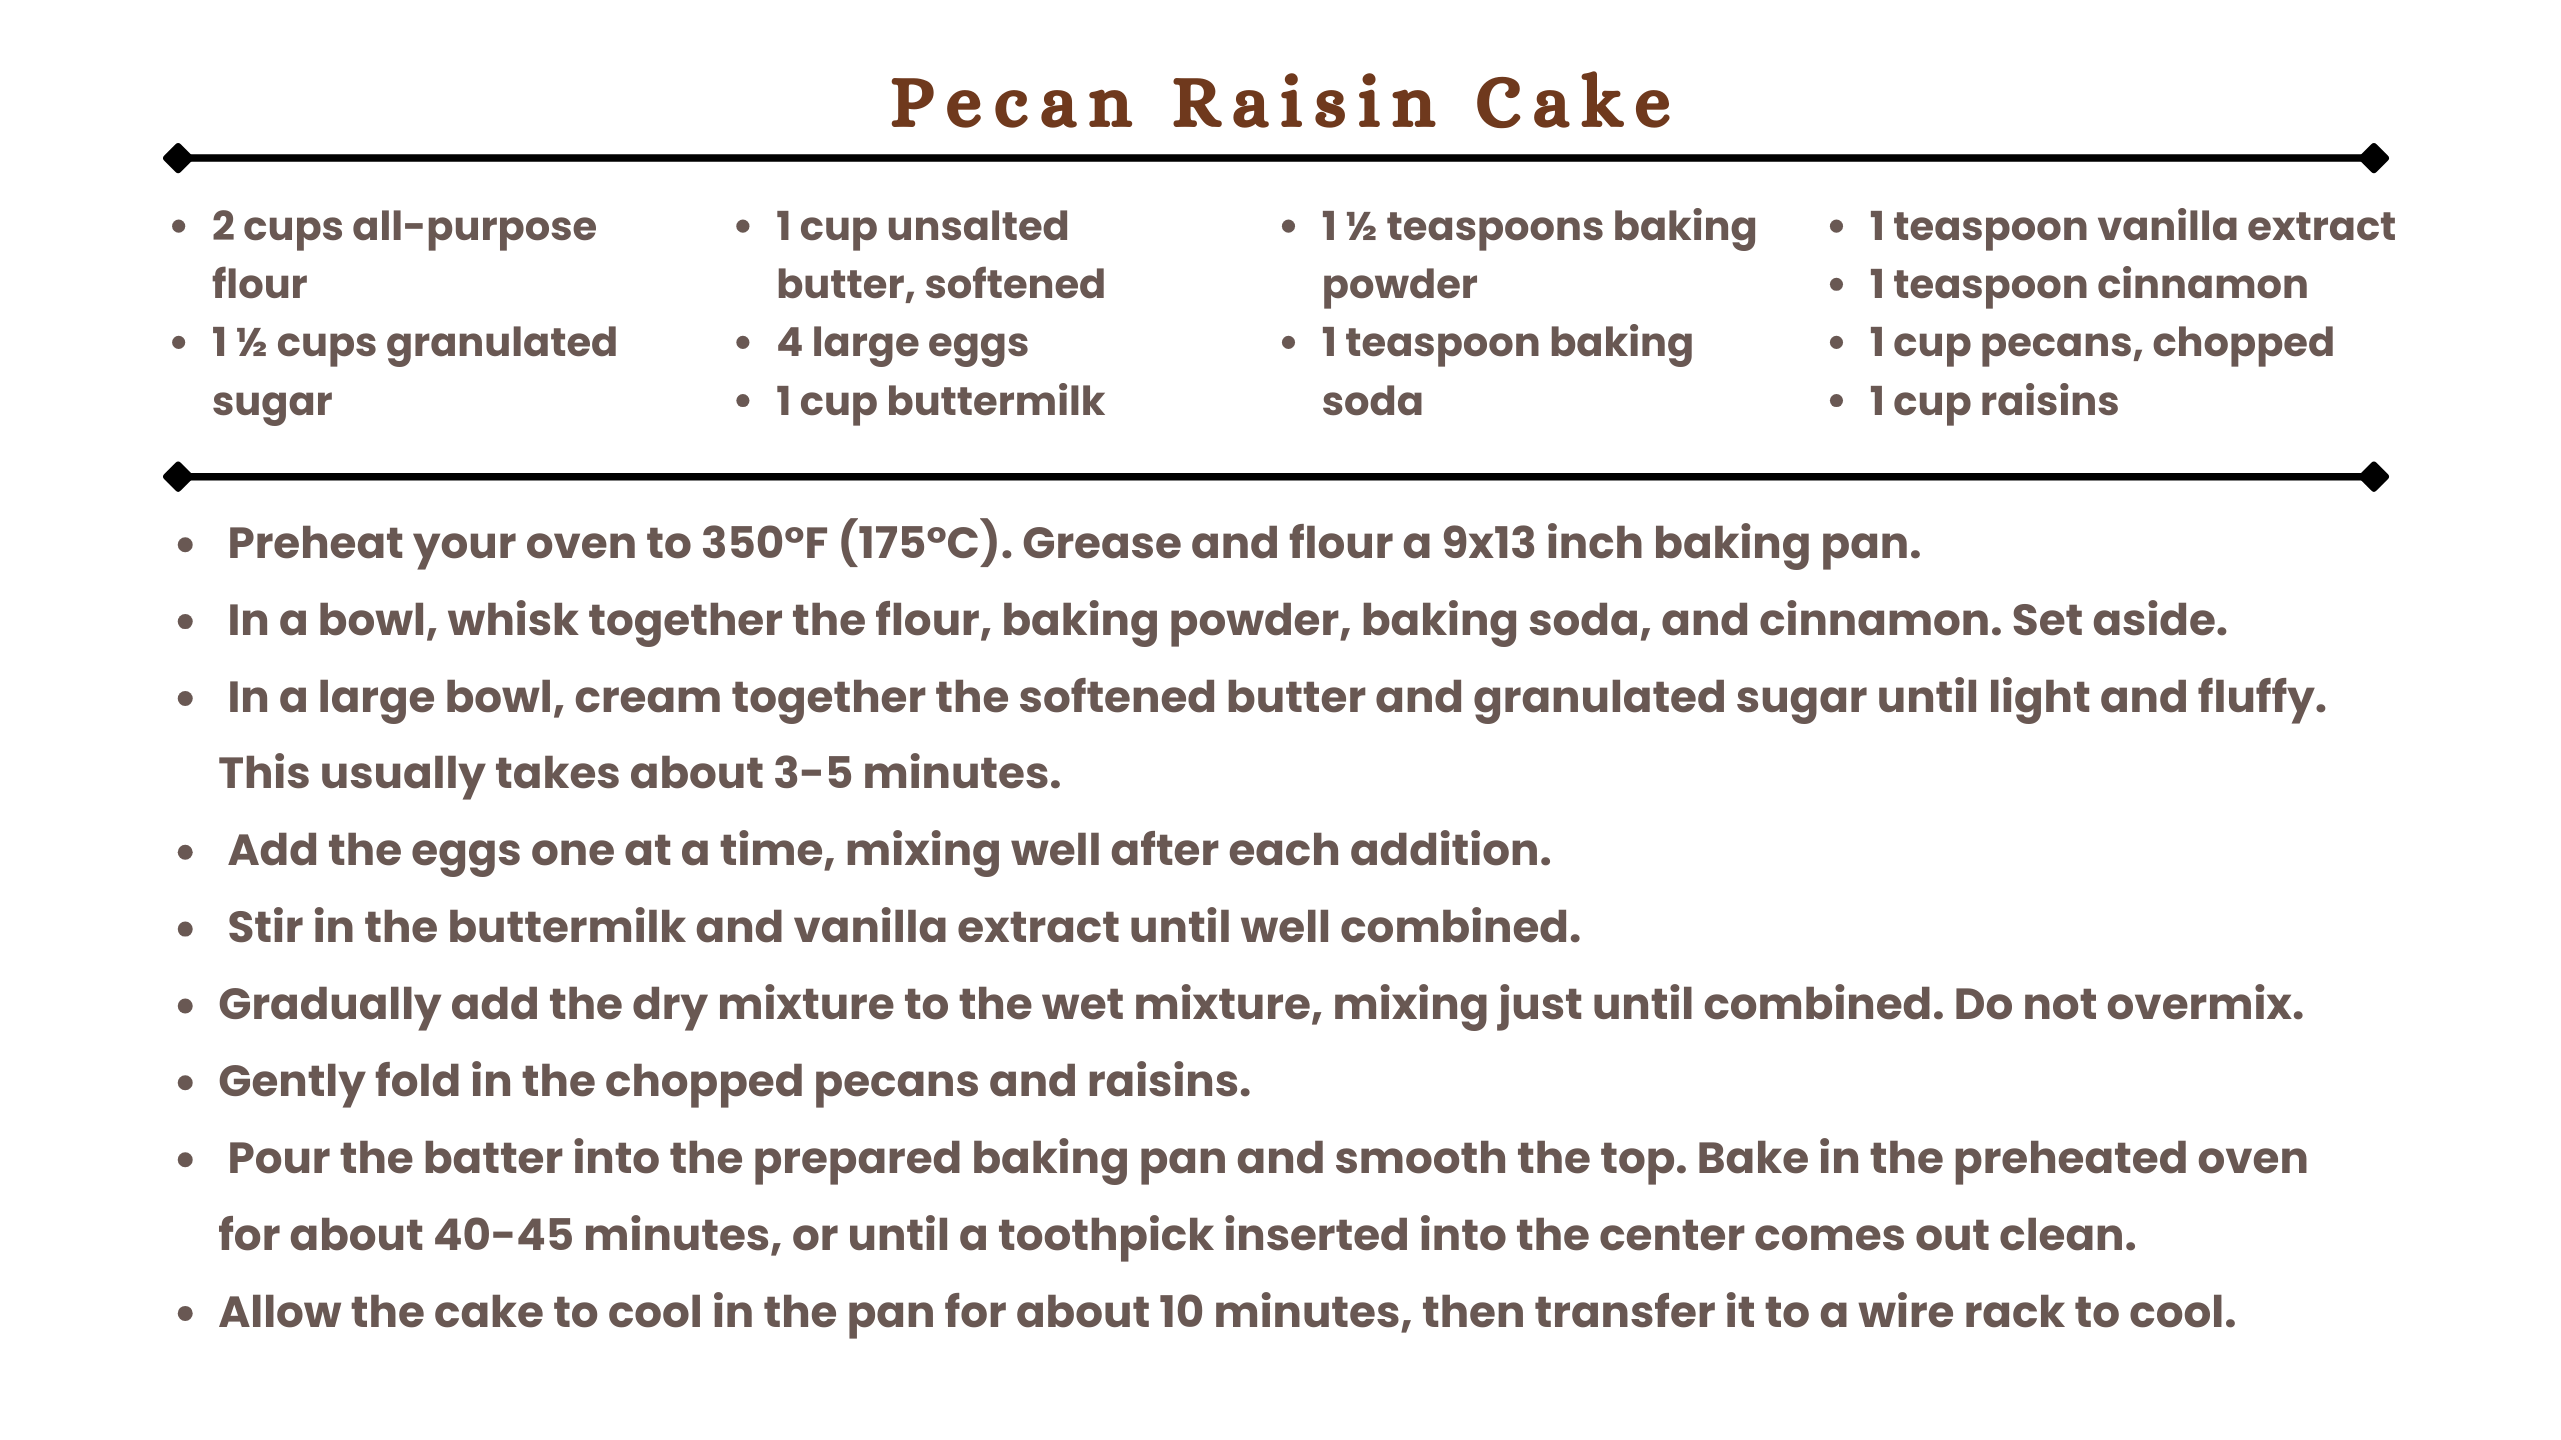
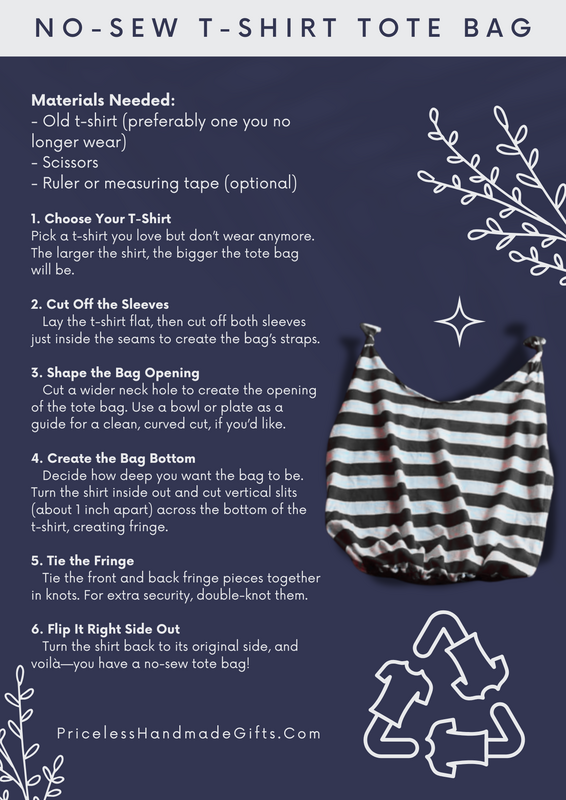
    We have some free printable bookmarks for quilters! If you are a seamstress, quilter, crafter, or artist, you will appreciate these quilting-themed bookmarks. Use them when you cuddle up in your handmade quilt to read a book. Or share them with friends who admire your quilting skills.


    You may print out these bookmarks on your printer at home. Just click on either one of the images below to access the free printable file for both of the pages of bookmarks. We recommend printing them out on white cardstock paper. If you only have copy-paper, that's okay, but you may want to laminate them for durability. Once you print out the bookmarks, simply cut them out with a paper trimmer or scissors, but do not use your fabric scissors! (Of course you wouldn't!)


    If you want to add a little bit of crafty fun to these bookmarks, you may punch a hole at the top of each one and add a handmade tassel. Or glue them back-to-back for a two-sided bookmark. Another idea is to use a corner-rounder punch. Adding embellishments like stickers, glitter, handwriting, stamping, or embossing will add that creative touch.


    Whatever you choose to do, we hope you have a fun time being creative with these printable bookmarks for quilters. We also hope you are able to take time to use them while reading a book. We know it's hard to stop quilting long enough to sit and read, so another option is to use these bookmarks in your quilting-idea pattern books.


    Happy Quilting!

  • Published on

    Salmon Veggie Quinoa Dinner Recipe

    Enjoy an easy-to-make dinner tonight with this recipe idea. With just a few ingredients, you will have a quick and tasty dinner.


    Cook salmon, quinoa, and steam your favorite vegetables, combining them for a delicious and healthy meal. See our recipe below.

    Quick and tasty dinner idea - salmon veggie quinoa.
  • Published on

    No-Sew T-Shirt Tote Bag DIY

    Years ago, I had fun upcycling t-shirts into shopping bags at my retail store. It was a big hit with the customers, who appreciated having reusable options to put their purchases in. I sewed the under-side of my bags, which you may also do. But below is a description of how to make fringe at the bottom and tie it closed with knots. That option is great if you don't have access to a sewing machine, or if you want your kids to help make the DIY t-shirt tote bags. Either way you decide to make it, your bag will be a great conversation piece at the store, especially if you use a t-shirt that has a great saying. Happy Upcycling!
    DIY shopping bag made from a t-shirt
    Easy No-Sew T-Shirt Tote Bag DIY Project Upcycling Tutorial
  • Published on

    Easy Bowtie Sewing Tutorial

    Learn how to sew a bowtie with this easy tutorial. This is a fun DIY project that doesn't require many supplies. Follow the instructions below to make a cute handmade bowtie with your sewing machine. If you don't have a sewing machine, that's okay. You can also sew this project by hand, though a sewing machine will give it more of a finished look.

    This is a great project for using up fabric scraps, as you only need a six-inch square of fabric and a few other supplies to begin. Scroll through the step-by-step instructions below.
    Happy sewing!!
    Easy DIY Handmade Bowtie Sewing Tutorial
    Easy Sewing Project - DIY Bowtie
    Supplies needed to make your own bowtie...
    Sew your own bowtie.
    Use fabric scraps to make a bowtie.
    Stabilize your fabric with a piece of felt.
    This is an easy sewing project, where you only sew straight lines.
    A quick sewing project for fabric scraps.
    An easy DIY fabric bow making tutorial.
    Sew your own bowtie by following these easy instructions.
    Use elastic scraps for this bowtie tutorial.
    An easy way to sew your own bowtie.
    Use a button as a bowtie closure.
  • Published on

    The Joy of Starting Your Next Project Today

    Are you a person who collects pins on Pinterest, hoping to try out a new craft idea? Or you watch all of the tutorials you come across on social media? Maybe you even go as far as to purchase supplies for that project, hopeful that you'll get around to making it someday. But somehow those supplies become easily forgotten and are still sitting in the shopping bag you brought home from the store months ago.

    It's not just you, it's most of us. Maybe we feel like we're not quite ready to begin. Will we have enough supplies? Will we get frustrated and give up? Will we continue with the project if it's not turning out perfect enough for our satisfaction. 

    What if we could embrace an imperfect beginning? If we start today, we may discover the joy that comes with making progress and creating. And learning a new skill is rewarding in itself, as it can likely apply to future projects as well. Use mistakes as learning opportunities and correct them as you can.

    It might not come together in a night but try to make progress every day or every week until your project is complete. Then improve your skillset by continuing onto the next project, whether it's using the same techniques, or experimenting with new ones.

    Below you will find practical tips to motivate you to begin. There is true joy that can be found in starting. So, begin your next project today!
    The joy of starting - why your next project should be today's project.